
Two Days of Brake Pad Replacement in My Poitiers Garage
After a challenging two-day process of replacing brake pads on my 2014 Peugeot 308 in my Poitiers garage, I learned valuable lessons about the intricacies of brake maintenance and the importance of thoroughness.
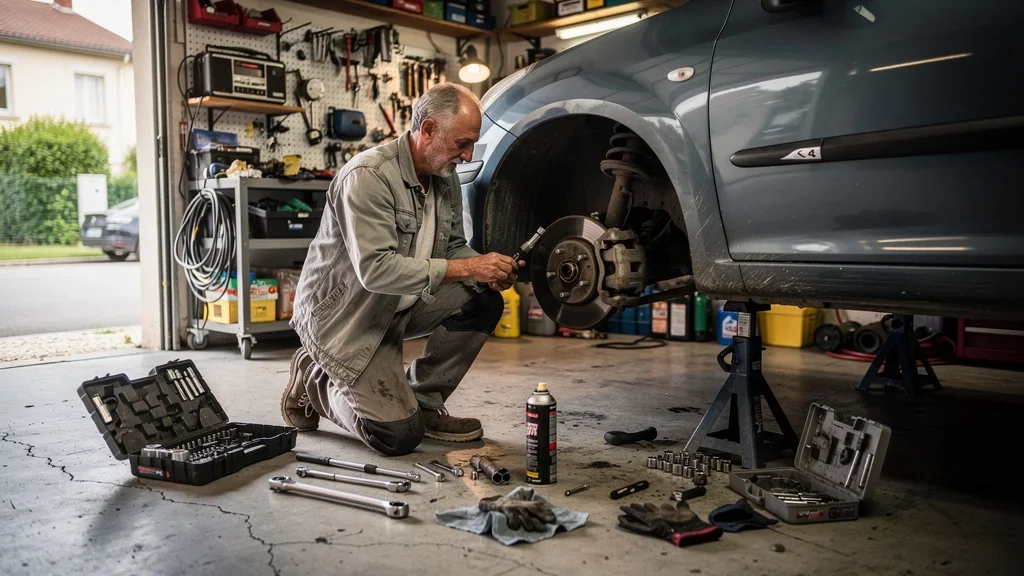
After reassembling everything in my garage in Poitiers, I pressed the brake pedal for the first time on my 2014 Peugeot 308 and immediately felt an unsettling, elongated travel—almost spongy. Under the buzzing Osram neon above my workbench, the silence became palpable. I had just finished using my Facom wrench, convinced I was done. I ordered Bosch brake pads for 47 euros, aiming to complete the job before noon.
A Simple Saturday Project Turns Complicated
I embarked on this task thinking it would be straightforward, a routine operation. Although I've been tinkering for years, I'm still an amateur mechanic, not a professional. In my Poitiers garage, I allocated three hours of work, equipped with a basin, a cloth, and a budget of 47 euros for the brake pads. A local workshop quoted me 186 euros for the same job, prompting me to take matters into my own hands.
Before lifting the car, I had already noticed a slight metallic noise during light braking. It wasn’t alarming—just an intermittent squeak at low speeds when returning from downtown. After an 8-kilometer drive, I also noticed one wheel was hotter than the other, accompanied by a lingering burnt smell near the wheel. The inside of the rim was coated with a dark, almost sticky brake dust.
I removed the wheel, still optimistic about finishing quickly. However, the task extended over two days because a seemingly simple brake pad change can quickly become complex when faced with unexpected issues. The car could still brake without giving clear warnings, and that deceptive calm was what surprised me the most.
The Inner Pad Diminished My Humor
Once the wheel was off, I discovered the inner pad was nearly worn down, while the outer one still had some material left. This disparity in wear hit me hard, as I realized I had delayed addressing the issue longer than I cared to admit. Under the garage's yellow light, the metal was close to being exposed, and I hesitated before touching the brake disc, which had a noticeable groove along the edge of the braking surface.
I gathered my tools, and that’s when the real struggle began. The caliper support bolt resisted more than I expected, and one of the guide pins refused to budge. I spent 25 minutes being meticulous instead of rushing. I cleaned the dust with a brush, then used a slightly damp cloth to avoid spreading grime everywhere.
The time-consuming part wasn’t just the disassembly; it was the caliper support, the contact surfaces of the pads, and the little anti-noise spring that almost jumped out of place and then stubbornly refused to be reinserted. I realized that if the pad doesn’t slide freely in its rails, the entire braking system can be compromised, especially when changing tires under challenging conditions. Reflecting on my previous solo winter tire change in a parking lot, I understood how a poorly installed component could complicate matters. A new pad won’t compensate for dirty sliding surfaces. There’s a clear difference between merely replacing a consumable and ensuring all components function correctly together. This thought often crosses my mind when I search for a hard-to-find used part at the junkyard, as it can take a long time to find a truly clean set.
In my Poitiers garage, with the buzzing neon and the door ajar to let in the humid air, where a DIY oil change without a catch pan can lead to a disaster, I quickly realized that even the slightest mistake could turn the floor into a trap. The smell of brake dust lingered in my nose for much of the afternoon. At that moment, I understood I wasn’t just engaged in a quick fix; I was in the midst of a project that required a proper finish, even if it became frustrating at times.
The First Brake Pedal Press Sent Chills
After reattaching the wheel and lowering the car, I paused before getting behind the wheel. I pressed the brake pedal six times with the engine off to reset the pistons. The initial press felt odd, longer than expected, with a slight delay before the pedal stiffened. Nothing alarming on paper, but it didn’t feel right in my mind. I turned on the ignition and tried again, experiencing the same unsettling sensation, which sent chills down my spine.
As I spun the wheel by hand, I felt a faint, consistent drag—not a complete lock-up, but a subtle, almost continuous contact that interrupted my momentum. That’s when I began to suspect there was more at play than just the pads. The piston might not be retracting properly, or one of the guide pins could be sticking. I examined the caliper, then the pedal, and back to the caliper. I wasn’t sure if I had installed a part incorrectly, but I sensed that something was impeding the return.
Looking back, I think I made the classic mistake during this installation. I pushed the piston back without opening the bleed screw during my initial bleed, thinking it would be fine. I also applied the guide pins a bit too dry on the first attempt, using only a thin layer of grease that wasn’t evenly distributed. Consequently, the brake felt almost adequate while stationary, but the wheel retained a slight drag. Such details become apparent at the first press of the pedal. The pedal never felt fully reassuring until I revisited the installation.
The silence in the garage felt even more pronounced at that moment. With the door open, I could hear a truck in the distance while staring at the car that seemed to be saying no. Not great. Really not great. I wasn’t going to drive off like that, even for a short three-kilometer trip to the bypass.
What I Did Before Hitting the Road Again
The following morning, I calmly revisited the work. I took off the wheel again and checked the piston retraction before even touching the new pads during my express technical inspection. This inspection had already taught me the importance of thoroughness, so this time I decided to disassemble more extensively, wanting to inspect the contact surfaces in the caliper support and clean them without rushing. I removed everything I had hastily reinstalled the day before, including the clips that seemed correct at first glance. Nothing was broken, but there was enough dirt to explain the stiff point.
I brushed the contact areas and applied a suitable grease in very small amounts, precisely where the pad rests and slides—not on the friction material, of course. I also checked the sliding of the guide pins manually, moving them back and forth before reassembly. The difference was immediately noticeable. The wheel turned freely, without that nagging drag that had stressed me out the day before. The anti-noise spring took me several more minutes, as it never seems to fit as depicted in the box’s diagram.
When I closed everything up, I sensed that the assembly had a different feel. During the second test, the pedal had a firmer consistency. After four braking tests on the way out of town, I noticed the braking became more decisive and less spongy. The car slowed down without pulling to one side, and the wheel felt warm to the touch, not scorching. The sensation was almost a physical relief.
That’s when I realized what I hadn’t fully grasped at the start. A brake system that seems somewhat adequate can still be poorly assembled. The mere condition of the pads doesn’t tell the whole story. The sliding of the guide pins, the pressure on the contact surfaces, and the retraction of the piston are just as crucial as the friction material itself. I learned this lesson in my Poitiers garage, with dirty hands and a slightly stiff back after spending 18 minutes redoing the right side.
What I Would Do Again Without Hesitation
I would undertake this work myself again, but with a more cautious approach. This experience reminded me that the actual time required can differ significantly from my initial assumptions. When everything goes smoothly, the change can be completed in a good half-day. However, once a stuck bolt or a dirty part comes into play, two days can pass quickly. I also learned that my initial budget didn’t reflect the entire story, as time and patience are just as critical as the 47 euros for the pads.
I won’t rush through the reassembly without checking the piston retraction and the condition of the guide pins. I won’t convince myself that a slight drag will resolve itself. What I’ve learned will stay with me in my actions, not just in words. I’ll clean the contact surfaces more thoroughly, take an extra minute with the anti-noise spring, and manually rotate the hub before closing everything up. That’s where I saw the clearest difference.
If a bolt refuses to budge, if the piston seems stuck, or if the wheel is still hot after three kilometers, I’ll stop and hand it over to the workshop on Victor Hugo Street. For someone willing to check the sliding, clean the contact surfaces, and redo the pedal press test, I would attempt this job again myself. For someone who just wants to drive without revisiting the issue, the local garage remains the better choice. I closed the door of my Poitiers garage with tired fingers, but the pedal was finally consistent.