
How to Remove Scratches from Your Car
Discover practical tips for removing scratches from your car, focusing on methods, products, and personal experiences to achieve a clean finish.
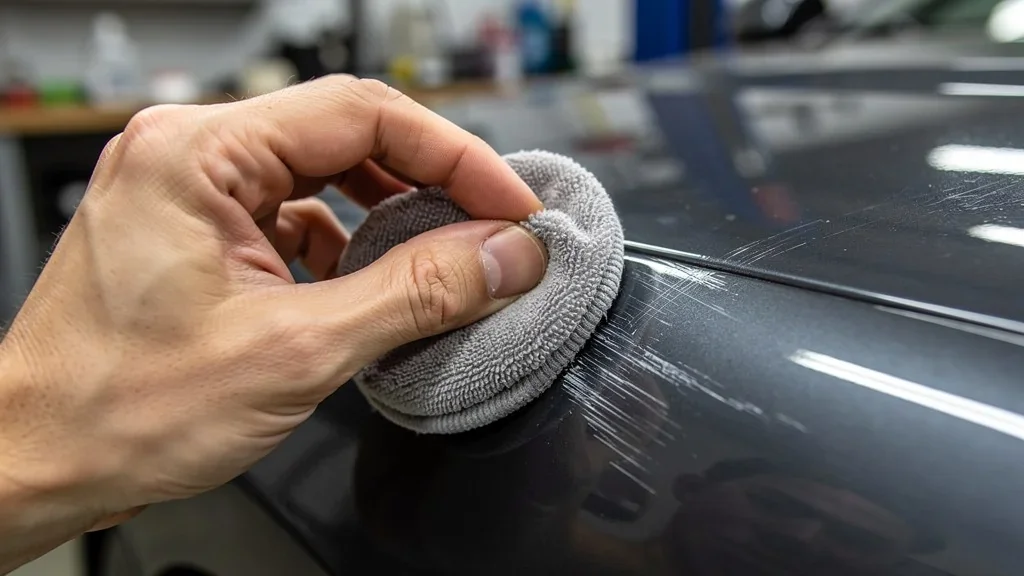
The microfiber cloth tugged slightly under my fingers, and the scratch almost vanished as I adjusted the panel under the light. When viewed flat, it was unnoticeable, but under direct light, the mark returned as a gray line against the black paint. This prompted me to find a way to eliminate scratches on my car without spending an entire day on it, as I lacked both the time and budget for a garage visit over a minor blemish. As an automotive writer for CarBling magazine, I have invested considerable time analyzing such defects, but the verdict on my Corolla surprised me on more than one occasion.
I work from my home in Poitiers, focusing on topics like this with the perspective of an everyday driver, rather than that of a chemist. I drive a 2016 Toyota Corolla hybrid with 130,000 km on the clock, and I keep it clean because I like to quickly spot any issues. Living with my partner and no children, I prefer to reserve my Saturdays for activities other than bodywork. This lifestyle allowed me to experiment without pressure, though I must admit I was often quite frustrated.
Understanding That Not All Scratches Are Created Equal
After washing and decontaminating the car, I was left with a mark that looked worse than it actually was. In the shade, it appeared alarming, but under direct light, it revealed just a network of micro-scratches on the clear coat. I realized that I needed to first diagnose the scratches rather than rush into using the first scratch polish I found.
- Invisible when flat but visible at an angle: I classify it as a micro-scratch.
- If my nail catches, I suspect a deeper mark.
- A white mark that wipes off with a cloth suggests a paint or plastic deposit.
To expedite the process, I focused more on assessing the area than on working on it, which helped me avoid making a foolish mistake, like attacking a dirty car surface.
My Personal Context and Its Importance
With a maintenance budget capped at around €50 per month, I wasn't eager to spend €400 on a minor touch-up. A past experience with an expensive repair due to a poorly installed oil filter made me cautious. I had previously returned from a shopping trip with products, thinking I should understand the situation better before making blind purchases.
My role as an automotive writer for CarBling has taught me to scrutinize a car's body closely, though I don't consider myself a detailing expert. I knew how to read a scratch, but I was less adept at selecting the right method on the first try. I proceeded cautiously, determined not to spend two weekends on a mark that should be easily removable.
Testing Scratch Depth and Deductions
I started with the fingernail test and then tilted the panel under a direct LED light. The defect stood out starkly against the black paint. In daylight, it seemed minor, but I could tell if my nail caught or not.
- If my nail glides, I attempt a light correction first.
- If my nail catches, I consider a touch-up more than a full polish.
- If color transfers to the cloth, I suspect material transfer.
The Products I Had on Hand Before Buying Anything
I already had a wash and wax for basic cleaning, a few clean microfiber cloths, a foam applicator, and a protective wax. Additionally, I owned a clay bar for surface preparation, a touch-up pen, and a brush in the trunk. I kept two natural remedies for scratches in mind—toothpaste and baking soda—but I was skeptical about their effectiveness.
- A mild polish for superficial scratches.
- A more aggressive polishing paste for a small area.
- A specific cleaning product for mineral deposits on the paint.
My Polishing Journey: The Ups and Downs
I washed the bodywork, followed by a light degreasing, and then applied masking tape to the edges. That alone took longer than expected. The most tedious part was dealing with the polish dust that got into the seams and around the badges. On my Corolla, I had to use a fine brush to clean the crevices before realizing I was finally achieving a clean surface.
| Step | Actions | Observations | |---------------|----------------------------------------------|-----------------------------------------------------| | Washing | Wash and wax followed by rinsing products | The scratch became clearer | | Decontamination | Clay bar and cleaning before treatment | The surface felt smoother under my hand | | Polishing | Light passes by hand | The mark faded but didn't disappear completely |
Washing and Decontamination: The Underestimated Basics
I briefly thought that washing would do most of the work. I was mistaken. Once the bodywork was clean, I realized the scratch was more than just dirt. The decontamination revealed mineral deposits on the paint, and I understood why the polish would have slipped on a dirty surface.
Rinsing the products also taught me a simple lesson. If I left a greasy residue, the microfiber would glide poorly, spreading particles everywhere. After that, I took the time to dry thoroughly before continuing, and I let the car air dry after polishing just to see the difference in the shade.
My Hand Polishing Trials: Why I Had to Be Cautious
I began with a foam applicator and a light polishing paste. The pad caught slightly as the area dried, and that small sound served as my guide. I made two to three light passes, wiping between each to see what remained.
I also noticed the polish whitening in the seams, around the badge, and at the edge of the rear light. It didn't look good. On a door edge, I pressed too hard once, and the surface heated up quickly. The gloss changed abruptly, becoming nearly dry. I felt foolish and immediately eased off.
- I reduced pressure as soon as the panel heated up.
- I changed microfiber cloths when they collected dust.
- I stopped rubbing in circles for too long on an edge.
On the black paint, the contrast was striking. From a distance, the corrected area looked perfect. However, under low sunlight, I could still see small holograms if I had pressed too hard with the compound. This forced me to refine my technique.
Comparison Table of My Tested Products: Effects, Time, and Limitations
I eventually compared what I had on hand with what I purchased in the €20 to €40 range. This was not a quest for a miracle product; I simply wanted to see what corrected, what masked, and what fatigued the finish.
| Product | Time | Perceived Result | Limitation | |-------------------------|------------------------|-----------------------------------------------|-------------------------------------------------| | Meguiar's mild polish | 15 minutes on a small area | Superficial scratches decreased significantly | Requires a clean finish | | Turtle Wax compound | 10 to 15 minutes | Good on material transfer | Leaves a haze if forced | | Touch-up pen | A few minutes | Better hides a deeper mark | Does not correct clear coat |
Realizations from My Experience
The turning point came when I took the car out of the wash into the sunlight. The scratch I thought was significant appeared to be just a network of micro-scratches. Another, however, retained its clear line, and my nail caught firmly. I was struck by the difference between what I saw in the shade and what the sun forced me to recognize.
- A mark can seem deep when it is merely a deposit.
- A scratch that penetrates the clear coat won't disappear with manual polishing.
- Overdoing it in the wrong place leaves a less clean finish.
Why Some Scratches Remain Even After Aggressive Polishing
When my nail caught firmly, I realized that the scratch had penetrated beyond the surface layer. Even the best polish cannot reconstruct the clear coat. It softens and diminishes the appearance, but it doesn't replace a proper paint repair technique.
I also attempted very light wet sanding with fine sandpaper on a thick area of the clear coat. I stopped quickly; while it could help, the risk became too high for me on an everyday car. Honestly, I prefer to leave it to a body shop if the mark is genuinely deep.
The Pitfalls of Using Aggressive Polish and Applying It on Edges
I used a product that was too abrasive on a light scratch and ended up with a dull haze instead of a nice finish. Not ideal. A microfiber cloth already loaded with dust left circular marks as soon as the light hit. I also learned that the edges of the hood and bumper corners are unforgiving.
Since then, I work in small areas and mask the edges more seriously. My movements are slower, but the surface remains cleaner. I no longer apply a strong compound just to save three minutes.
What I Would Have Done Differently in Retrospect (and What I Advise Against)
In hindsight, I would have reserved polishing for superficial scratches and material transfer. I would have left toothpaste, white vinegar, coconut oil, and cigarette ashes among the grandmotherly tips I only glanced at. For a true scratch, these natural remedies make more noise than results.
- I wouldn’t rush a quick pass on a still-dusty car.
- I wouldn’t press too hard on the edges.
- I wouldn’t use a tired cloth for the final wipe.
How I Tailored My Method to My Needs and Constraints
I ultimately developed a straightforward method. Washing, decontamination, small area testing, appropriate polishing, finishing, and then protecting against scratches with a protective wax. This framework prevented me from getting sidetracked. From my years as an automotive writer for CarBling, I understand that the issue isn't a lack of products but a lack of method.
| Profile | My Approach | Observations | |-----------------|-------------------------------------------|-------------------------------------------------| | Novice | Mild polish, small area, wiping between passes | Less risk of circular marks | | Tight Budget | A kit in the €20 to €40 range | Acceptable results without buying three products | | Dark Paint | Slower work and control under low sunlight | Holograms are more visible quickly |
If You’re a Novice Seeking Quick Results Without Professional Equipment
In my case, the simplest approach was to stick with a mild polish and a clean foam applicator. I avoided the orbital polisher at first because I wanted to feel what my hand was doing. I worked on a 20 cm area before moving on, which helped me stay calm.
The trap is wanting to correct everything at once. I’ve seen polish dust stick in the seams, causing me to waste ten minutes with a brush. I prefer the cleanliness of a slow approach over the mess of haste.
If You Want to Correct Light Scratches on a Tight Budget
I kept my purchases modest, which forced me to make wise choices. One scratch polish, two decent microfiber cloths, and a foam applicator were sufficient. The rest I already had for regular maintenance.
For a light scratch, I prefer a short and clean method rather than a basket full of specialized cleaning products. I’ve found that an anti-scratch product overly marketed as a miracle often just lightens the wallet. A clean result comes more from technique than from labels.
If You Have a Dark Car or More Significant Scratches
With a black car, I’ve become more cautious than with my old 2003 Peugeot 206. Micro-holograms become apparent quickly, and any excess stands out under the light.